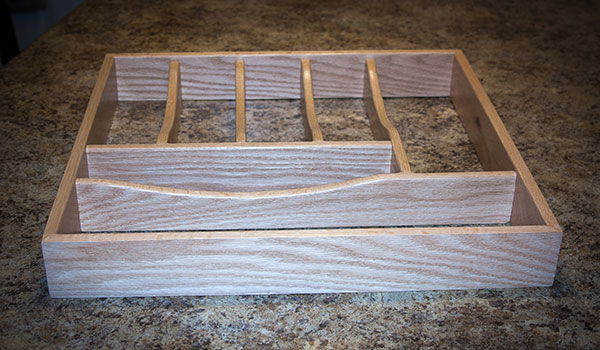
Custom made white oak silverware divider
No Comments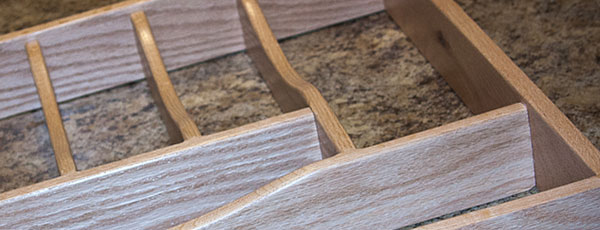
So for Christmas my mother mentioned that she was tired of the plastic silverware organizers that she's used for decades and wanted something made out of wood. With this knowledge I set off to design a silverware divider that would fit my parents drawer perfectly. I had my father discretely measure the drawer one day while my mother was out of the house. I then cut up a sheet of 1/4" plywood and ran over to the house to test the fit and then embarked on designing things.
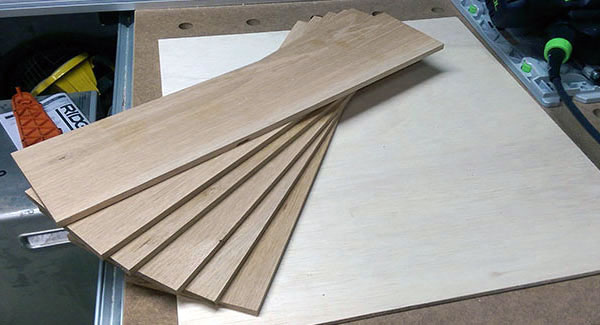
I had a bunch of rough 5/4" white oak (acquired, coincedentally from my mother's father's basement when my grandparents sold their house) in the shop and my parents cabinets are white oak so I figured it made sense to stick with the same wood species. I milled up the wood and then resawed it down to 1/2" strips. Sadly I had issues with resawing on my bandsaw and was forced to do this task on the tablesaw, which quite frankly I do not recommend – I wasted a ton of wood doing it this way (between the blade kerf and the mistakes). Turns out though that I was an idiot and hadn't pulled down on the bandsaw blade tightener (didn't notice this till I was done building things).
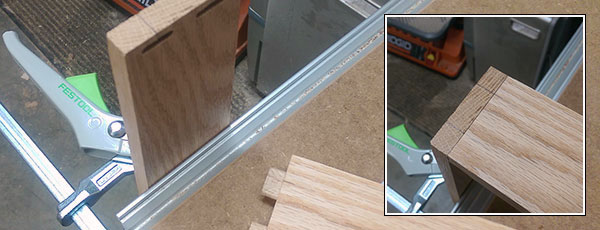
I knew that the outer shell was going to be joined using butt joints and loose tenons so I started with the outer frame.
I then worked out where I wanted the miscellaneous items dividers to go and added those, fastened with loose tenons again. Problem is I made a few mistakes with alignment which resulted in those boxes being larger then I wanted.
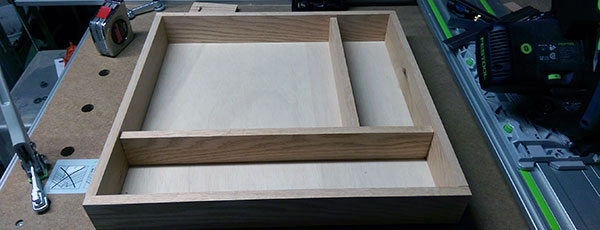
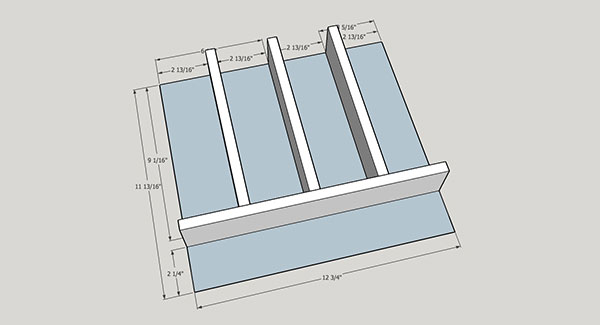
Now that I knew what I had for available space for the rest of the sections I took to SketchUp to design things properly.
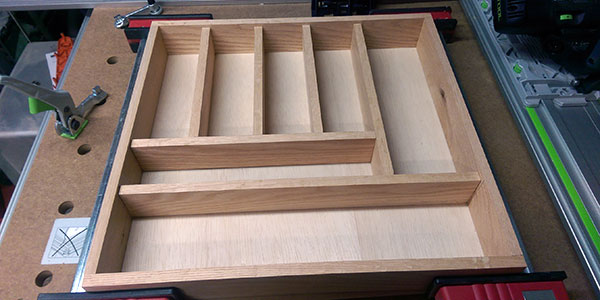
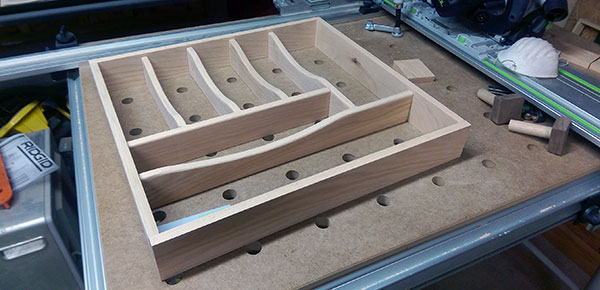
Now it was time to build out what I began calling the inner box. This proved to be the hardest part for me. I agonized over the Domino setup, tested multiple times on scrap and even still made issues that forced me back to the beginning where I had to mill up more 1/2" stock. I hope that I never forget the lessons I learned about Domino placement on this project (this was one of two somewhat simultaneous projects where I utilized my new Festool Domino DF 500 for the first time). After what seemed like forever I was finally done with the overall shell, secured with loose tenons everywhere there was a butt joint.
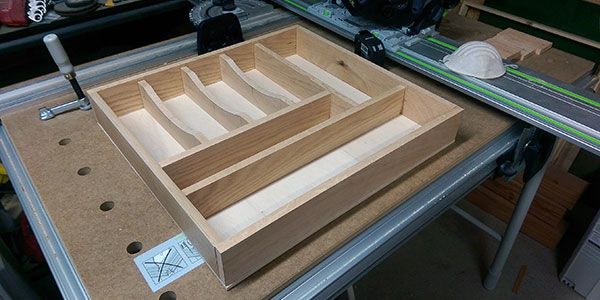
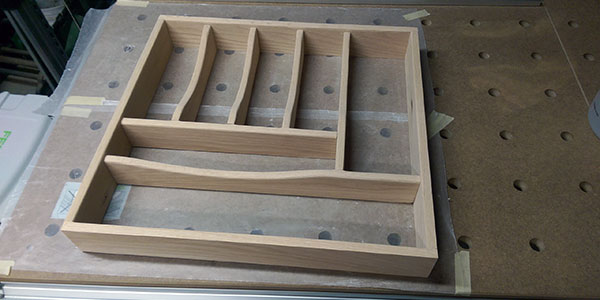
After the tray was assembled it was pretty clear that the dividers needed to shaping. I started with the inner box, creating a slope that I felt would work, tweaked it a few times and then cleaned it up for one of the dividers. I then used that as a pattern for the rest.
As I don't have a router table in the shop I created a makeshift one out of some plywood.
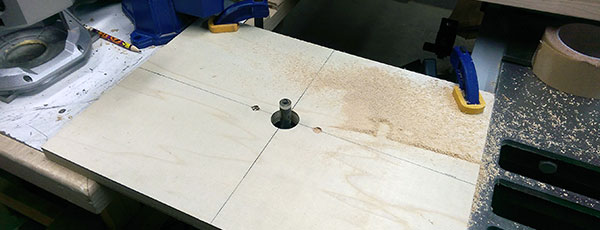
I used the divider that had the pattern the way I wanted and with carpet tape adhered it to the others, one at a time, and routed to ensure they were all the same. I then took this pattern and applied it to the longer pieces, adjusted accordingly. Once the rough shape was in place I grabbed my rasp and began easing all of the edges to make it easier to both access the silverware and to also ensure that users didn't get hurt by any sharp corners.
Before glue up I sanded all the pieces to 180 grit and then glued and clamped everything up. I let it sit overnight.
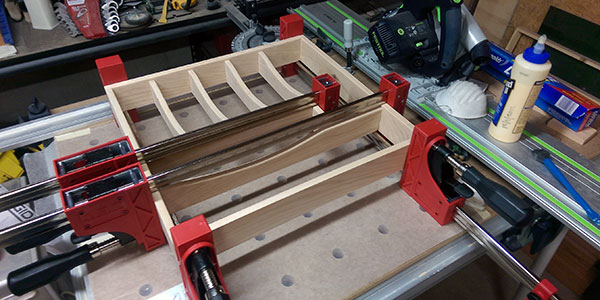
After the glue was dry I took the tray out of the clamps, cleaned up all the squeeze out that I missed previously and then sanded things to 180 where needed again. I then took 220 grit and sanded everything by hand.
I already knew going into this that I was going to use some General Finishes High Performance Water Based Satin Poly for the finish. I wanted something that would dry quick and not have an offensive odor. Overall this product worked well, I'm pleased with the outcome even though the piece was difficult to apply finish to (in hindsight I probably should have done some prefinishing before glue up). I applied only three coats with a light 320 and then 400 grit sanding in between.
More posts in Woodworking

Handmade walnut trivets
January 07, 2015