Handmade walnut trivets
No Comments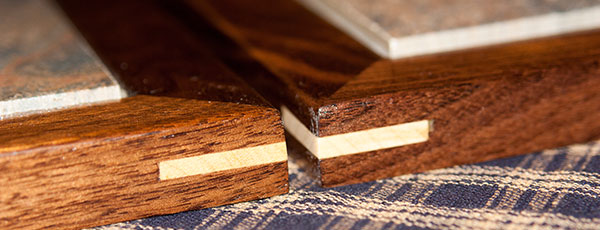
For quite awhile now I've wanted to make some trivets using wood and porcelain tile. I picked up some square tiles at the local Home Depot and set off making a prototype. I learned quickly that not all 6" tiles are actually 6". Some have as much as a 1/4" variance in one dimension or the other, others are exactly the same in both directions (and usually come in around 5 7/8").
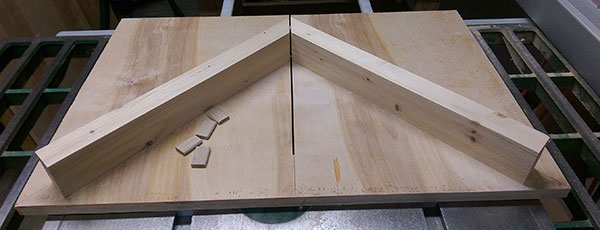
In order to get the prototype built I determined I needed a miter sled for my tablesaw (as my chop saw just wasn't cutting it), so as is the case with all of my projects, I embarked on a mini-project within the main project.
Once I had a prototype established I had to decide on the wood to use. For me that was easy, it had to be walnut, or something dark that would pop once finish was applied so I headed to the lumberyard and came home with a pile of walnut.
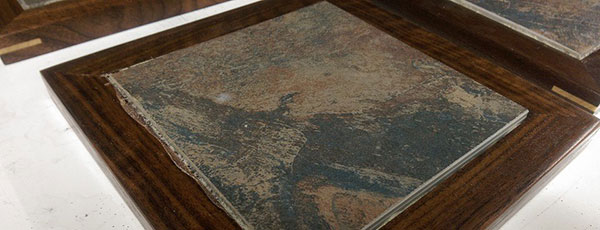
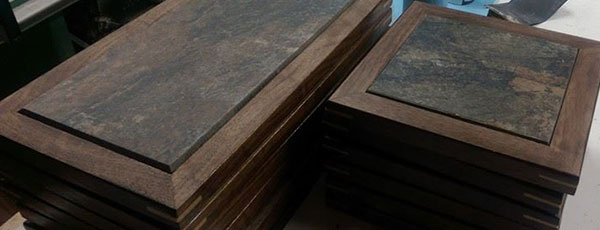
I didn't much care for the tile selection at the local Home Depot so my wife and I headed to Lowes one night and they had a larger selection, we ended up picking a tile that had multiple earthy tones in it but more on the muted bluish gray realm, something that we felt would look really nice with the walnut. We grabbed a pile of the square tiles and had an associate cut us some 6" by 12" tiles so I could make two different sized trivets.
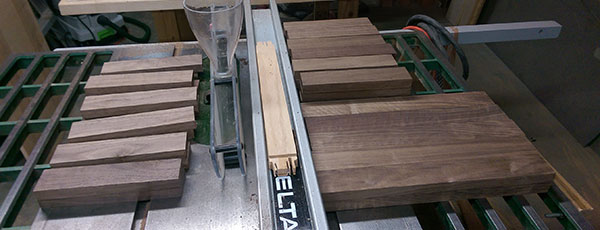
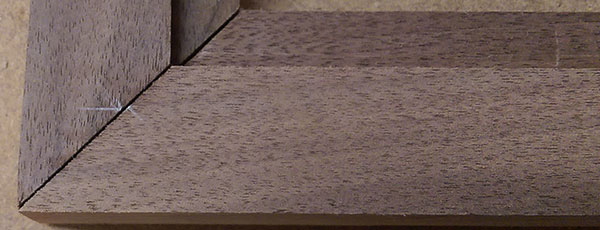
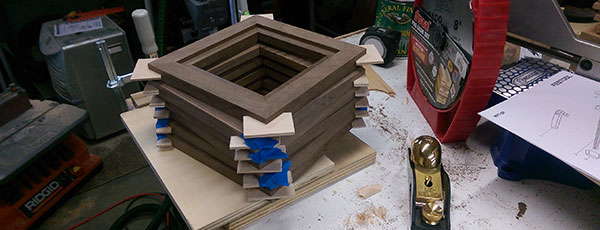
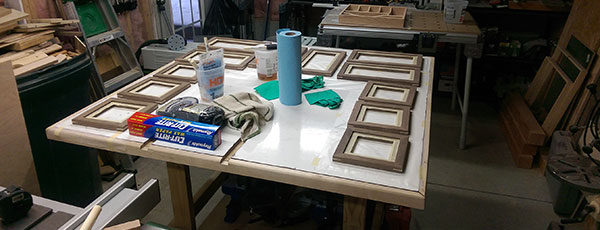
As I had a bunch of these to make I decided to focus on the square ones first in an effort to make sure I had something done in time for Christmas. I milled up the walnut, created a pile of 1 1/2" sides. Then I started on the miters, one side at a time, being careful to ensure that I marked the sides that were to be joined. Once I had one side done I calculated and cut the second set of miters.
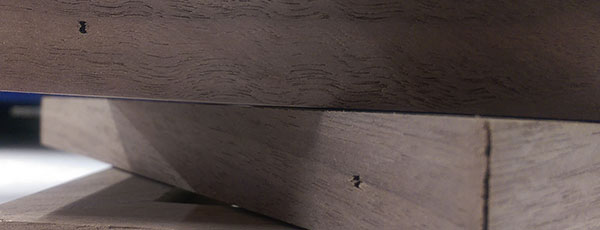
From here I had to cut a rabbet to accept the tiles. This proved to be a bit harder then it should have been. I ended up having to run the wood over the dado blade multiple times and even still there were discrepencies across the length of the piece. If I had a better router and setup I would have preferred to use that to cut the rabbets. Given that the tiles themselves are going to be irregular anyways I wasn't terribly concerned with this but did take my rabbeting block plane to try and level off the uneven areas as best as I could.
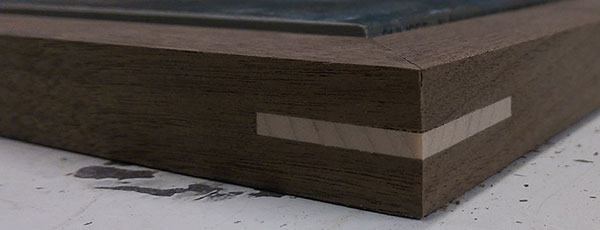
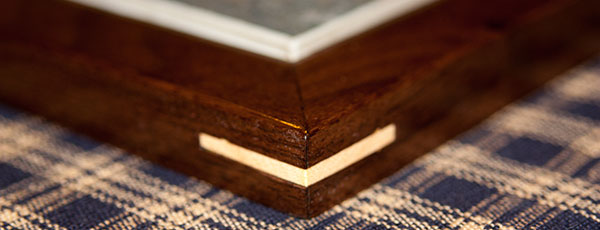
As mitered joints are notoriously weak I wanted to make sure to strengthen them and decided I was going to play a little and use my new Festool Domino DF 500. As I had never used it before I practiced multiple times on some test pieces and then started, timidly, on the real pieces. Immediately I noticed that I was occassionally punching through the visible side. I had already planned to add splines (in a contrasting wood) for both strength and apperance I decided this wasn't that big of a deal.
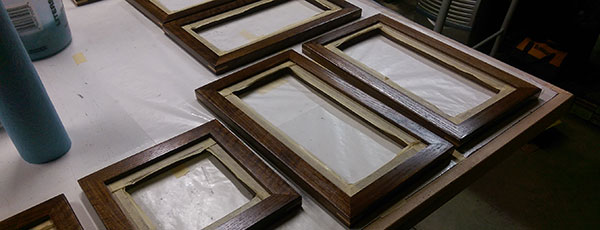
It was then on to the glue up. I am really bad at glue ups but tried very hard to do a good job and ensure that the mitered corners were as tight as I could get them (while staying as square as possible). Even with diligence I made mistakes with a few. I solicited feedback online and the concensus was to use some walnut colored Timbermate, which I did. It helped conceal my mistakes, not completely but at least things looked better.
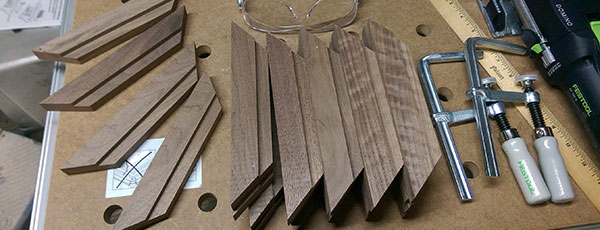
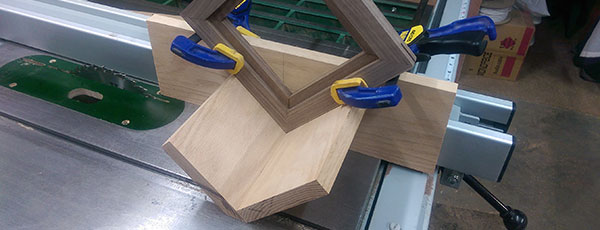
Once the glue had dried I cleaned up the miters with another new shop tool, the Festool ETS 125. This made fairly quick work of the levelling process. From here it was time to begin cutting the splines. Enter another new shop jig (and subsequent mini-project), the spline sled. Honestly I messed up building this, it was supposed to ride in the miter slot but I secured the angled pieces incorrectly so I had to run it against the fence (which honestly I'm okay with).
While cutting these splines it became clear that I should really be using a box joint blade as the alternating top blade (ATB) I had made the splines grooved which caused gaps after the splines were glued in.
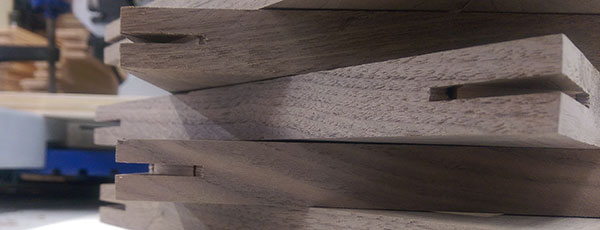
Next up was to cut the splines. I love the contrast between maple and walnut so I sliced up a bunch of small splines and fitted them in as tightly as I could, this proved to be a task as for some reason not all of the slots were exactly the same thickness even though I clamped each frame into the sled when cutting them.
Once the glue was dry on the splines it was just a matter of trimming them off and using the sander to flush things up.
Now that I was through the square trivets I started over with the rectangle trivets, however, based on feedback I received online I did no use any loose tenons and I used masking tape to pull the joints together. Overall this approach worked pretty well, I had fewer mistakes to clean up this time around.
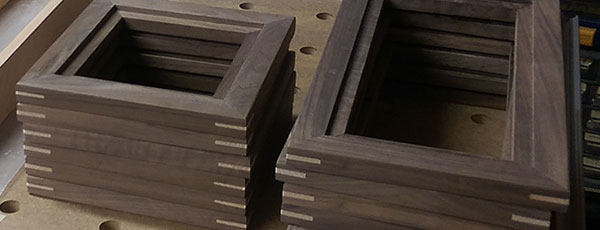
Now it was time to ease the edges and sand to 220. I used my rabbeting block plane to slightly chamfer the top edges and then used my ETS 125 to sand things to 180 grit. As I didn't have any 220 abrasives for the sander I did the rest by hand, rounding over the corners nicely.
Now it was time to decide on how to finish these. At first I wanted something that would dry quick so asked at the local Woodcraft and ended up leaving with a can of General Finishes High Performance Water Based Satin Poly. When I arrived home though I started second guessing myself and therefore asked a fellow woodworker for advice, he sent me to this approach. As I'm a Guild Member I already trusted Marc so I set out to buy some boiled linseed oil, mineral spirits and poly. I then tested both on some scrap walnut.
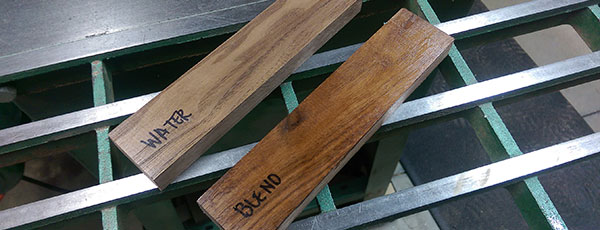
I'm so glad I did this test. If I hadn't I'd have used the water based poly and never known how much nicer the oil blend would have looked. It was the winner hands down, at least for the walnut.
Once I finished another project slated for Christmas I had my kids come help me clean up the shop in an effort to remove as much dust as possible so I could start applying finish.
As I didn't want to have any finish interfering with the adhesives used to hold the tiles in place I taped up the grooves before applying finish.
Over the course of about a week I applied four coats of the blend with a light sanding in between as needed using 320 and then 400 grit. While this did add some protection to the wood it was minimal but sufficient for my needs (I wasn't looking for a glossy finish).
Finally we've reached the point where the tiles need to be added and secured. Online I found multiple options ranging from grout, Liquid Nails, silicon and hot glue. So what did I go with? Truth be told I chose poorly, went with some Gorilla glue which, while strong enough, I failed to realize that it expands quite a bit. My wife helped me do the glue up one night, I woke the next morning to an ugly mess.
I was so distraught, having planned to get these out in the mail for my mother in law the next day, now I couldn't possibly do that. I began to chisel/scrape off the glue that had bubbled up onto the finished surfaces as carefully as I could (it was a futile effort, the surfaces were ruined).
Thankfully cooler heads prevailed (my wife), she ended up helping me that day by cleaning up all 12 of them quite nicely. I then too to sanding them down again (which removed the glue but also the little bit of finish that had been built up).
Once everything was cleaned up nice I took to applying finish again, this time I modified my approach a little bit – wiped on the blend and let it sit for 15 minutes before I wiped it down. This ultimately resulted in a much nicer finish the next day but one that had very little sheen.
I kept at it and after 3 coats I wasn't getting a sheen remotely close to what was on the sides so on the fourth attempt I wiped on a thin coat that I didn't wipe off, this provided the appropriate sheen but also left things feeling tacky. I took some 400 grit sandpaper to try and remove that tacky/gritty feeling a bit which ended up being too much and had to apply another coat. I decided this time to carefully apply a thin coat of finish – to do this I switched out my wiping cloth multiple times to keep the cloth from being too saturated, this helped but still didn't quite result in the finish I wanted so I did one more coat, let it sit for 15 and wiped it off.
At this point it was the night before Christmas Eve (when they would be need to be wrapped and delivered) so I had no choice but to accept where they were at.
Overall they came out looking really good but it was quite a journey. Finishing is one of those things that can make or break a project. If I were to do this again I'd worry less about the sheen and would use the approach of wiping off after 15 minutes. In fact I might even forgo the poly and just do a 50/50 oil/thinner mix. This lets the beauty of the wood really shine. This might mean more coats are necessary but that is a price I'm willing to pay for a nice looking piece.
More posts in Woodworking

Custom made white oak silverware divider
December 26, 2014